
Posts tagged ‘recipes’
i lost my mom exactly three years ago. since little bird’s passing, the thanksgiving holiday (ever our family’s favorite) has become more of a time of reflection than of feastivity (yeah, not a typo). i stopped preparing that lengthy to-do list and detailed menu that served as the countdown to turkey time (in fact, turkey no longer makes an appearance at our table). i don’t strategize about what time the night before i need to prepare the brioche dough. or when i should bound out of bed the next morning, so the pecan rolls will be ready when everyone else rises for coffee and televised parades. what remains the same is the sense of gratitude i feel for having had her in my life.
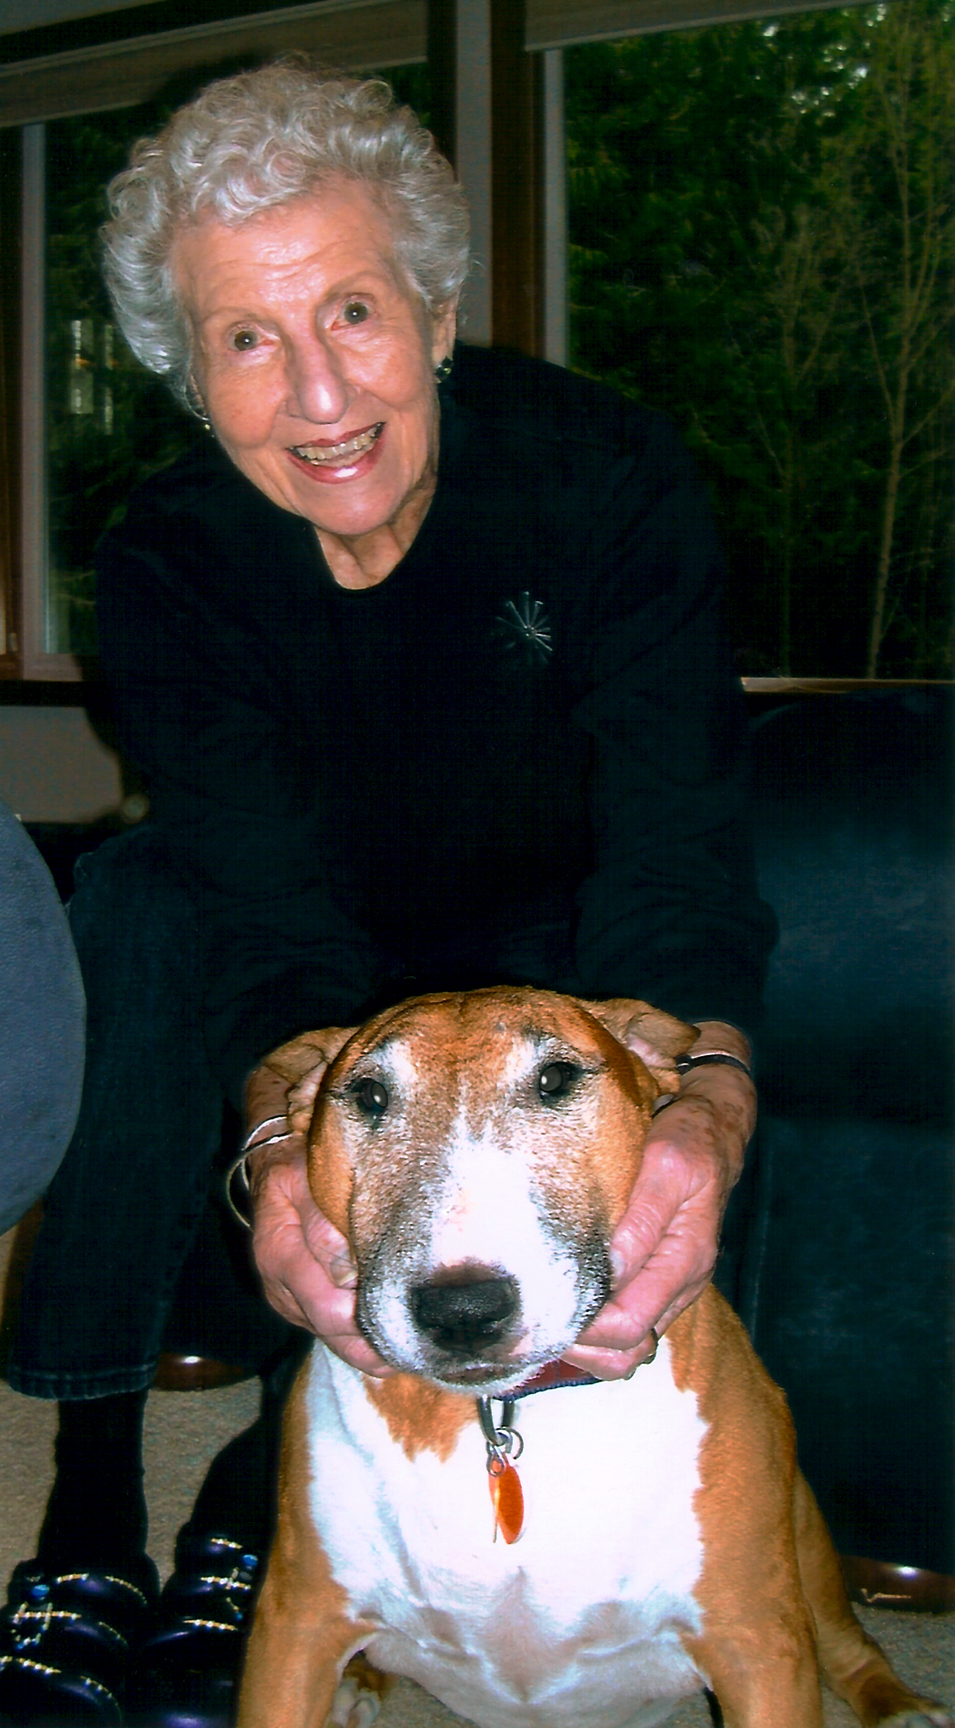
both of my zingy girls (mom and Winnie, the adorable, devilish English bull terrier) are gone now. they each had larger-than life personalities, equally huge hearts and generous spirits. more than once, i caught mom bending down and saying to Winnie, “you are one hot spud.” even in her twilight years, Winnie would respond with much tail-wagging, a few crisp barks of agreement and several speedy laps around the family room. then, of course, would demand a treat—and take a well-deserved snooze. they loved food, me and each other. maybe not exactly in that order.
little bird and Winnie had a zest for life. i’m dedicating this little number to my two, feisty, spicy gingers. until i see you again, keep each other company. love you to the moon and back…
Spicy Gingerbread
a recipe from flour by Joanne Chang
INGREDIENTS
2 sticks butter, at room temperature
3/4 cup light brown sugar, packed
3 tablespoons grated fresh ginger
2 eggs
3 1/2 cups unbleached all-purpose flour
1 tablespoon baking powder
1/2 teaspoon kosher salt
2 teaspoons ground ginger
1 teaspoon freshly ground black pepper
1 teaspoon cinnamon
1/4 teaspoon ground cloves
1 1/2 cups unsulfured molasses
1 cup boiling water
1 teaspoon baking soda
DIRECTIONS
- preheat oven to 350°F.
- butter and flour a 9 x 13–inch pan.
- using a stand mixer fitted with a paddle attachment, cream the butter and sugar until light and fluffy (2 – 3 minutes); scrape down the sides and bottom of the bowl to make sure there are no lumps.
- in a small bowl, whisk together the grated ginger and eggs until blended.
- with the mixer on low speed, add the egg mixture, and beat until just combined.
- scrape the sides and bottom of bowl, then beat on medium speed for 20 – 30 seconds, until mixture is homogenous.
- in a medium bowl, sift together the flour, baking powder, salt, ground ginger, pepper, cinnamon and cloves; set aside.
- in another medium bowl, whisk together the molasses, boiling water, and baking soda.
- on the lowest mixer speed, add 1/3 of the flour mixture to the mixture already in the bowl, then beat until incorporated.
- pour in one half of the molasses mixture, and continue to mix at the lowest speed until combined; scrape down the sides and bottom of the bowl.
- on the lowest mixer speed, add half of the remaining flour mixture, and beat until incorporated.
- add the remaining molasses mixture, and beat until incorporated.
- stop the mixer, and scrape the sides and bottom of the bowl.
- add the final flour mixture, and beat on low speed for about a minute.
- scrape the batter into the prepared pan.
- bake for 50 – 60 minutes, or until the top of the cake springs back when pressed lightly in the middle.
- let cool in pan on a wire rack.
serve with vanilla-bean whipped cream. let your dog lick the whipped cream off the whisk. give your mom the biggest, bestest piece.

as i sit down to write this post, my mind rushes back to those first, early fall days of school. sitting at my desk, hands folded and donning a new dress (what a little lady) expertly chosen by my mother, i’d hang on every word uttered by my adored teachers. then, at their direction—and this was my favorite part—i’d choose a shiny new, razor-sharp #2 pencil and begin to craft my annual essay about how i spent my summer vacation.
had i been assigned the same teacher two years in a row, she likely would have been lulled into a coma by the redundancy of my essays: 50 percent dedicated to the blast i had at girl scout camp and the remaining 50 percent to the wicked-good times i had with my family at the beach. i was never bored by either.

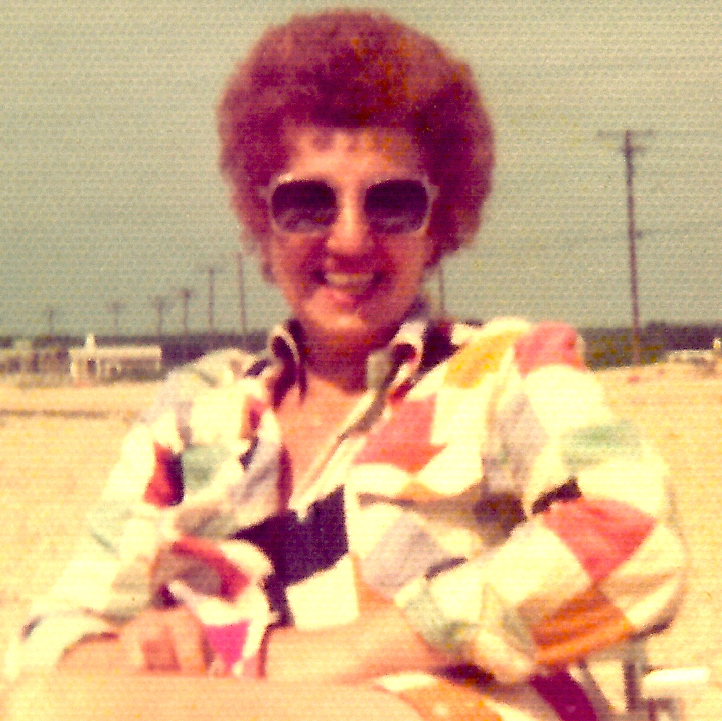
an older me, sis at the Cape
my parents, younger sister and i spent several summers down the Cape (translation: at Cape Cod, Massachusetts): wonderful, lazy weeks of swimming, combing the beach for sea shells and soaking up sunshine—without the oppression of inland humidity. but some of favorite beach days were spent at Crane’s Beach, on Massachusett’s north shore.
we’d jump out of bed early on a weekend morning and throw on our swimsuits. my dad would back the Impala out of the garage and pack the cooler with ice. then, mom would yell, what kind of sandwiches do you want, peanut butter and jelly? GAG. i think Cheryl wants peanut butter. can i please have bologna? in my mind, i said a bologna prayer. anything to avoid peanut butter.
with sandwiches, chips, sodas and Oreos snuggled inside the cooler, we headed to Crane’s. upon arrival, mom and dad scouted out an ideal location, spread out beach towels and hunkered down with books. my sister took her pail and shovel and began the dig to China. i’d walk down to the shore and up through the garnet sand to the dunes; we’d all take dips in the frigid water to cool down.
in a few hours, mom inevitably declared time for lunch! as inevitably, Cheryl’s peanut butter sandwich attracted sand, and she’d cry. i’d happily sit on my towel, munching on my bologna. in the middle of the afternoon, we’d haul ourselves back to the Impala and make the drive back to suburbia. satisfied with yet another beautiful New England day at the beach.
this summer’s essay: i spent a lot of time at the farmers’ markets, enjoying the amazing weather and cooking up dishes with fresh produce. i made a few pies and grilled a fair amount of pizzas. but didn’t begin baking in earnest until this month. ever on a quest to find a replacement for the dreaded peanut butter, i stumbled upon Artisana nut butters. their team was kind enough to send me some samples, and i decided to test out the pecan butter with a dense, dark chocolate sandwich cookie recipe, reminiscent of our best days at the north shore.
little sis, this one’s for you. infinitely better than what was on your white bread. and now i’ll have some nut butter to put on mine!
Homemade Chocolate Sandwich Cookies
a recipe from the flour cookbook with a slight variation
makes 16 – 18 good-size cookies
plan in advance, as the dough sits in two stages for a total time of at least 3 hours before baking.
INGREDIENTS
for dough
1 cup (2 sticks) unsalted butter, melted and cooled slightly
3/4 cup granulated sugar
1 teaspoon vanilla extract
1 cup semi-sweet chocolate, melted and cooled slightly (recipe calls for chips; i used 4 2-ounce Schaffenberger semi-sweet squares)
1 egg
1 1/2 cups organic unbleached all-purpose flour
3/4 cup Dutch-processed cocoa powder
1 teaspoon kosher salt
1/2 teaspoon baking soda
for nut-butter filling
1/4 cup (1/2 stick) unsalted butter, softened
3/4 cup confectioners’ sugar
1/2 cup smooth nut butter (my pecan butter wasn’t completely smooth, but worked well and received kudos from those who snarfed them down and wanted more)
pinch of kosher salt
DIRECTIONS
- in a medium-size bowl, whisk together the butter and granulated sugar until well combined.
- whisk in the vanilla and melted chocolate, then add the egg, and whisk until completely incorporated.
- in another medium-size bowl, mix together the flour, cocoa powder, salt and baking soda.
- using a spoon, stir the flour mixture into the chocolate mixture to form a dough.
- let sit at room temperature for an hour.
- transfer the dough to a 15-inch square of parchment paper.
- shape the dough into a rough log, about 10 inches long and 2 1/2 inches wide.
- roll the parchment paper around the log.
- with the log fully encased in parchment, roll until smooth, maintaining the 2 1/2-inch diameter.
- put in the frig for at least 2 hours or until firm; reroll every 15 minutes or so to maintain the round shape.
- preheat oven to 325 degrees.
- cover baking sheets with parchment paper.
- cut the dough log into 1/4-inch slices, and place them at least 1 inch apart on the baking sheets.
- bake for around 16 – 20 minutes, or until the cookies are firm to the touch. they’re dark, so you won’t be able to see if they’re done by just looking.
- let the cookies cool to room temperature on the baking sheets.
- to make the filling, using a hand mixer, cream the butter on low speed for around 30 seconds, or until soft and smooth.
- add the confectioners’ sugar and beat until the mixture is completely smooth.
- add the nut butter and salt, and beat until smooth.
- scoop one rounded tablespoon of the filling onto the bottom of one cookie.
- top with a second cookie, bottom-side down, then press the cookies together to spread the filling toward the edges.
i sent some of these babies with Tootie to her monthly staff meeting. rumored to be a huge hit (hope you enjoy the recipe, gals!). much like Oreos, a perfect accompaniment to a tall glass of whole organic milk. i bet they’re even better eaten at the beach.
ENDNOTE
alternatively, you can make a vanilla cream filling with the following:
1/2 cup unsalted butter
1 2/3 cup confectioners’ sugar
1 teaspoon vanilla extract
1 tablespoon milk
pinch of kosher salt

 there’s an old farm field, a mile or so south of the town where we live. when it rains, large pools of water form in the middle of it. a frequent condition in nearly-always-drenched western Washington. i never thought there was anything extraordinary about that former pumpkin patch—until one dark night in November.
my sister, nieces and i were headed home from hospice, after a visit with my mom. along the stretch of highway between the hospital and the house, we drove with heavy hearts, in silence. suddenly, a great blue heron arose from the field, crossed in front of my windshield—lanky legs dangling in my line of vision—and headed west toward the sound. the next day, my mom passed away.
mom would have found it ironic that i believe she’s been channeled by a stunningly bright blue heron. blue was her least favorite color, an aversion that seemed totally irrational to me: i just don’t like it, she’d say emphatically. yeah, i don’t like beets, but there’s a darn good reason for that; they’re completely disgusting. it took me about 10 years to coerce her into even considering wearing blue jeans. but once she warmed up to the idea—and later in life—she rarely went out in anything else on her bottom half.
now, pink. pink was a color my mom could get behind.  she gravitated toward all shades of pink equally. so for birthdays and holidays, i kept an eye out for pink gifts: handbags, hats, tank tops, fleece jackets, even candy (who could resist Godiva dark chocolate filled with raspberries??). whatever the season, whatever the reason, pink was in. to celebrate mom this year, i set out to make pink cupcakes loosely based on a revered childhood snack: Hostess Sno Balls. it seemed like a fitting tribute to my mom and to a now-struggling company whose treats had been the shining stars in my Twiggy lunchbox.
lesson learned: my skill sets lay in something less demanding than cupcake creation, like making pies. but i’m sharing the recipe here, for those of you who can hold on to a pastry bag and aren’t challenged by Pantone color-matching frosting. the cupcakes tasted great, but the all-natural food coloring i incorporated lost its rosy glow.
every time i drive by the old farm field, i watch for my blue heron. sometimes i see her there. like i did this mother’s day. i break into a smile and wave. and i get a little teary-eyed. but i was always kind of a sap, right, ma?
Not-So-Pretty in Pink Cupcakes
inspired by a Back in the Day Bakery recipe
a combination of chocolate cupcake and coconut frosting recipes from Joanne Chang’s flour cookbook (as i’ve said previously, an absolutely fabulous, gotta-have volume)
makes 12 moist dark chocolatey cupcakes
INGREDIENTS
for the cupcakes
2 ounces unsweetened chocolate, chopped
1/4 cup Dutch-processed cocoa powder
1 cup granulated sugar
1/2 cup (1 stick) butter
1/3 cup water
1/2 cup whole organic milk
1 egg
1 egg yolk (save the egg white)
1/2 teaspoon vanilla extract
1 cup organic all-purpose flour
1 teaspoon baking powder
1/2 teaspoon baking soda
1/4 teaspoon kosher salt
for the frosting
3/4 cups sugar
3 eggs whites (use the egg white saved from the batter recipe)
3/4 cup (1 1/2 sticks) butter, at room temperature, cut into 2-inch chunks
1/2 teaspoon vanilla extract
1/8 teaspoon salt
1/3 cup coconut milk
for the topping
2 cups sweetened shredded coconut
DIRECTIONS
- place paper cupcake liners in a standard 12-cup muffin tin.
- in a medium-size heatproof bowl, combine the chocolate and the cocoa powder.
- in a small saucepan, combine the sugar, butter and water.
- over medium-high heat, whisk until the butter is melted and sugar dissolved, around 3 to 4 minutes.
- pour the hot butter mixture over the chocolate-cocoa, and whisk until the chocolate is completely melted, and the mixture is homogenous.
- then whisk the milk, egg, egg yolk and vanilla into the chocolate mixture, until thoroughly combined.
- in a small bowl, whisk the flour, baking powder, baking soda and salt.
- dump the flour mixture on top of the chocolate mixture, and whisk until the dry ingredients are completely incorporated into the chocolate mixture.
- let the batter sit at room temperature for at least an hour. or transfer to an airtight container, and store in the frig for up to three days.
- preheat the oven to 350F.
- spoon the batter into the prepared cups, dividing the batter evenly.
- bake on center rack of oven for 20 to 30 minutes, until the tops spring back.
- cool completely on a wire rack.
- to make the frosting, in a small heatproof bowl, whisk the sugar and egg whites to form a thick slurry.
- place the bowl over simmering water (should not touch the water) in a saucepan and heat, whisking occasionally, until the mixture is hot to the touch, around 6 to 8 minutes.
- remove the bowl from the heat, and scrape the mixture into the bowl of a stand mixer fitted with a whip attachment.
- whip on medium-high speed for 6 to 8 minutes, or until the mixture becomes a light, white meringue, cool to the touch. (i whipped until soft peaks just began to form, which seemed to work.)
- on low speed, add the chunks of butter, a few at a time.
- increase the speed to medium, and mix for 4 to 5 minutes, or until the butter is completely incorporated; the mixture should look smooth and glossy. at first it looks as if it’s curdling, but don’t panic. just keep going until it smooths out.
- add the vanilla, salt and coconut milk, and whip until the coconut milk is completely incorporated, and the frosting is smooth. you may need to scrape the bottom of the bowl in the process.
- remove the cupcakes from the muffin tin.
- hollow the center with an apple corer, going down a little shy of 1 inch.
- fit a pastry bag with a round tip, fill the bag, then pipe the frosting into the center of the cupcakes.
- if you’re brave and have the appropriate kind of food coloring, add to the remaining frosting until you’ve achieved the appropriate shade of pink.
- for prettier cupcakes, fit the pasty bag with a star tip, refill with the pink frosting, and decorate the cakes.
- alternatively, spread the frosting on the cupcakes with an icing spatula. (i employed this method as it made the cupcakes look more like Sno Balls.)
- place the shredded coconut in a small bowl.
- gently roll the frosted cupcakes in the shredded coconut.


you crack me up, roly poly
especially after a grueling, humorless workday
i crack you up, well, because, i’m genuinely funny
you are infinitely more modest
self-sacrificing and fragile
my perfect dinner (breakfast, lunch) companion
i’ll catch you on the flip side, baby
dedicated to my dear friend, Paul, and his eggceptional chickens

yeah, Elroy thought i was talking about him, not some silly egg. sorry, dude.
Go, Dutch Baby, Go
a slight variation of a Cole Dickinson recipe, as found in the Williams-Sonoma catalog
INGREDIENTS
for topping
1 cup heavy cream
1/2 vanilla bean
2 heaping teaspoons bakers’ sugar
fresh berries
for batter
3 eggs
3/4 cup all-purpose organic flour
3/4 cup organic whole milk
3/4 teaspoon vanilla extract
4 tablespoons (1/2 stick) organic butter
DIRECTIONS
- preheat oven to 425 F.
- in an 11-inch French skillet over medium heat, melt the butter; set aside.
- in a blender, combine the eggs, flour, milk and vanilla; mix on high until frothy, about 30 seconds (stop and scrape down the sides, if needed).
- place the skillet with the melted butter in the oven (recommend covering the handle with foil to avoid burns).
- carefully pour the batter into the hot skillet.
- bake the Dutch baby until it’s lightly browned and the sides have risen, about 15 – 18 minutes.
- while the baby is in the oven, scrape the vanilla bean into the cream and whip with the sugar until light and fluffy; set aside.
- wash/slice berries; set aside.
- remove the Dutch baby and let cool for just a few minutes; the sides will fall, so don’t get deflated.
- divide the Dutch baby into wedges, then top each with whipped cream and berries.

today, Winnie the English bull terrier turns 98. that’s 14 in people years. she’s as spirited and demanding as she was at three months, when she first became a member of our family. yeah, sometimes she forgets things. like why she was walking down the hallway. but who doesn’t? she’d rather snatch a little nap before dinner, instead of gnawing on some rubbery-tasting toy. but who wouldn’t? and if she can look pitiful and manipulate someone into giving her part of his/her dinner, well, who could blame her?
Winnie spent the afternoon sunning on the deck and taking a spritely jaunt around the yard. tonight we’re serving her an appetizer of flax treats, followed by a course of organic dog chow sprinkled with pieces of organic flank steak. for dessert? a slurp of vanilla ice cream. only a slurp, so she can retain her girlish figure. she’ll be in bed by 7:00. but who wouldn’t, after such a glorious day?
the humans took their hats off to Winnie by baking and consuming a few too many whoopie pies; you’ll find the delightful recipe below.
many happy returns of the day, pumpkin! my life and cherry coffee table wouldn’t have been the same without you.
Chocolate Whoopie Pie with Mint Buttercream Filling
a variation on a recipe found in whoopie pies by Sarah Billingsley and Amy Treadwell
a really cool whoopie pie cookbook
makes about 40 2-inch cakes = 20 2-inch whoopie pies
INGREDIENTS
for the cakes
1 2/3 cups organic all-purpose flour
2/3 cup unsweetened cocoa powder (i use Scharffen Berger)
1 1/2 teaspoons baking soda
1/4 teaspoon salt
4 tablespoons organic butter, at room temperature
4 tablespoons organic vegetable shortening (i use Spectrum)
1 cup dark brown sugar, packed
1 large egg
1 teaspoon vanilla extract
1 cup buttermilk
for the filling
2 cups confectioners’ sugar
4 tablespoons organic butter, at room temperature
3 tablespoons heavy whipping cream
2 teaspoons vanilla extract
1/2 teaspoon mint extract
1/4 teaspoon salt
DIRECTIONS
- preheat oven to 350F.
- line two baking sheets with parchment paper; set aside.
- in a small bowl, sift together the flour, cocoa powder, baking soda and salt; set aside.
- in the work bowl of a stand mixer fitted with a paddle attachment, beat the butter, shortening and brown sugar on low speed until just combined.
- increase the mixer speed to medium and beat until fluffy and smooth, about 3 minutes.
- add the egg and vanilla; beat for another 2 minutes.
- add half the flour mixture and half the buttermilk to the batter in the work bowl and beat on low until incorporated.
- scrape down the sides of the bowl.
- add the remaining flour mixture and the last 1/2 cup of buttermilk, then beat until completely combined.
- using a 1-tablespoon cookie scoop, drop the batter one tablespoon at a time onto the prepared baking sheets, spacing the cakes at least 2 inches apart.
- bake one sheet at a time for about 10 minutes each, or until the cakes spring back when pressed gently.
- remove from the oven, and let the cakes cool on the baking sheet for about 5 minutes, before transferring to a rack to cool completely.
- to make the filling, in the work bowl of a stand mixer fitted with a paddle attachment, beat together the confectioners’ sugar and the butter, beginning on low and increasing to medium speed, until the mixture is crumbly, about 1 minute.
- add the heavy cream, vanilla, mint extract and salt.
- beat on high until smooth, about 3 minutes.
- to assemble the cakes, spread the filling onto the flat side of one of the cakes using a knife, spoon or pastry bag with a round tip to pipe the filling.
- top with another cake, flat-side down.
- repeat with the rest of the cakes and filling.


what i’ve got they used to call the blues. uh, yeah. perhaps generated by a relentless Sunday afternoon downpour? just a thought. nothing better than discovering one of the best cookie recipes ever to warm the heart and to make the entire house smell like heaven. amen.
Chocolate – Chunk Oatmeal Cookies with Pecans and Dried Cherries
a recipe from Cook’s Illustrated, with a tweak or two
makes 16 oversize chewy, buttery, decadent cookies
INGREDIENTS
12 tablespoons organic butter, softened but still cool (i used salted butter and cut the salt in the original recipe in half)
1 1/2 cups dark brown sugar, packed
1 large egg
1 teaspoon pure vanilla extract
1 1/4 cups unbleached organic white flour
3/4 teaspoon baking powder
1/2 teaspoon baking soda
1/4 teaspoon salt
1 1/4 cup organic old-fashioned rolled oats
1 cup pecans, chopped (recipe says to toast, but not my personal preference)
1 cup dried tart cherries
4 ounces bittersweet chocolate (like Scharffen Berger), chopped into uneven chunks (about 3/4 cup)
DIRECTIONS
- heat oven to 350F.

- line 2 large (18 by 12-inch) baking sheets with parchment paper.
- in a medium bowl, whisk flour, baking powder, baking soda and salt; set aside.
- in another medium bowl, combine the oats, pecans, cherries and chocolate chunks; set aside.
- in a stand mixer with a flat beater attachment, beat butter and sugar at medium speed until there are no sugar lumps.
- scrape down the sides of the bowl, then add the egg and vanilla.
- beat on medium-low speed until fully incorporated.
- with the mixer on low, add the flour mixture until just combined.
- with the mixer still running on low, gradually add the oat mixture until just incorporated.
- with a rubber spatula, give the dough one final stir to ensure there are no flour pockets and ingredients are evenly distributed.
- divide the dough evenly into 16 portions, each about 1/4 cup.
- roll the dough between your palms into balls about 2 inches in diameter.
- stagger 8 balls on each baking sheet, spacing them about 2 1/2 inches apart.
- using your hands, gently press each dough ball until it’s 1-inch thick.
- bake for 12 minutes (in my oven, 10 minutes), then rotate the baking sheet and continue to bake until the cookies are medium brown and the edges have begun to set, but the centers are still soft (the cookies will seem underdone and will appear raw, wet and shiny in cracks), about another 8 to 10 minutes (in my oven, another 5 minutes).
- cool cookies on baking sheets on a wire rack for 5 minutes.
- using a wide metal spatula, transfer cookies to wire rack, and cool to room temperature.

down with a giant glass of organic whole milk. glorious!
 my friend Lourdes exudes a burning passion for baseball. she gives thanks for the end of football season because it means spring training looms on the horizon. when i was small, my dad took me and my sister to watch the Red Sox play at Fenway Park; i fell asleep during the game. that feeling of being lulled into a coma lives on. but lately i’ve been thinking about being thrown a curve ball. or two. when life doesn’t unfold exactly as i’d planned. or hoped.
at these times, i have to remember to embrace the sweet things. like a handsome bulldog raising his heavy head up for a little scratch behind the ears. a sunny day in February, unseasonally warm enough to jump on the tractor and mow the lawn for the first time in months. a crisp, clear night, where Cassiopeia dangles just above the backyard tree line, twinkling like a shiny mobile. a winter run of California strawberries so red, plump and fragrant that i’m inspired to to break out—and experiment with—a new shortcake recipe. which is exactly what i did.
an integration of two different shortcake recipes, the end result offers a deep chocolate flavor and feels light while retaining a dense texture. who could go awry when fusing strawberries, chocolate and whipped cream?
 for my friends and family (my mother is still a HUGE Red Sox fan; i picked her up a pink Sox cap on my last trip to Bean Town) who are baseball fanatics, go whomever! for the rest of us, enjoy whatever the fairer weather brings.
Chocolate Strawberry Shortcakes
a variation based on recipes from The Best of fine Cooking Chocolate! and from Cross Creek Cookery
INGREDIENTS
for the dough
2 1/4 cups organic white flour
1/4 cup granulated sugar, plus some for sprinkling
4 teaspoons baking powder
1/2 teaspoon salt
1/4 cup Dutch-processed cocoa powder, plus three tablespoons (i used Green & Black’s organic cocoa powder)
8 tablespoons organic butter
6 1/2 ounces semisweet chocolate, grated or finely chopped; more for garnish
3/4 cup heavy cream, plus 3 tablespoons for brushing
1 1/2 teaspoons pure vanilla extract
1 egg, well beaten
for the topping
4 – 5 cups strawberries, cut in 1/2-inch thick slices (around 3 pints)
1 1/2 cups heavy cream
2 tablespoons granulated sugar
1/2 teaspoon pure vanilla extract
DIRECTIONS
- line a heavy baking sheet with parchment paper.
- in a medium bowl, whisk the flour, sugar, baking powder, salt and cocoa powder.
- cut the butter into the dry ingredients, until the largest pieces of butter are the size of peas.
- add the grated chocolate, and toss to combine.
- in a liquid measure, combine the heavy cream, vanilla and egg.
- make a well in the center of the flour mixture, then pour in the liquid ingredients.
- mix with a fork until the dough is evenly moistened and just combined; it should look shaggy and still feel a little dry.
- while the dough remains in the mixing bowl, gently knead by hand to pick up any dry ingredients remaining in the bottom of the bowl, then form the dough into a loose ball.
- turn the dough out onto a lightly floured surface, and pat it into an 8-inch square, 3/4- to 1-inch thick.
- transfer dough to the parchment-lined baking sheet, cover with plastic wrap and chill for 20 minutes.
- preheat oven to 400F.
- remove dough from fridge, and trim about 1/4 inch from each side to create a neat, sharp edge (i used a pastry scraper to do this).
- cut the dough into 9 even squares, each about 2 1/2 inches square.
- spread the dough squares two inches apart on the baking sheet.
- brush each shortcake with a thin layer of cream; sprinkle generously with sugar.
- bake until the shortcakes are mostly firm to the touch, about 18 minutes.
- pour the cream into a small, cold mixing bowl, and beat with a hand mixer until the cream begins to thicken.
- add the sugar and vanilla, then whisk by hand until the cream is softly whipped or until the whisk leaves distinct marks in the cream. it should be soft and billowy, but still holds its shape.
- while the shortcakes are still warm, split them in half horizontally with a serrated knife.
- for each serving, set the bottom of the shortcake on a plate, covering with 1/2 cup of strawberries; add a generous dollop of whipped cream, then cover with top of shortcake.
some people like to sprinkle sugar on the strawberries and let it sink in to sweeten, before placing on the shortcakes; i think this recipe is sweet enough without doing so. - top each shortcake with another dollop of whipped cream and a sprinkling of grated chocolate.
 well-honed technique. vast experience. a combination possessed by the finest master craftsmen. i was one of these craftsmen. an award-winning fire builder by the age of 10 (according to a panel of expert girl scout counselors), i specialized in the log-cabin style. in the heat of competition, i’d scour the woods for the kindling i knew would ignite the fastest. locating the right-size branches, i’d construct a design that would make my counselors beam with pride. arms piled high with the highest-quality materials and with the clock ticking, i’d sort my stash and become immersed in my creative process.
meticulously building the log cabin came naturally (the persistent perfectionist). and i had refined my technique sufficiently to streamline the process. surely and swiftly, i lit my match, then touched it to the kindling. blowing steadily, but softly, i encouraged the flame to engulf the smaller pieces of wood. soon ablaze, the dry wood began to crackle, flames leaping high (don’t worry; there was a water bucket within reach). i heard a whistle blow, and one of the counselors announced the victor: me. blush. not bad for a nerdy bookworm.
to the victor go the spoils. in this case, the counselors came and sat around my fire. i added a few logs, so we could settle in for our evening program of eating too much sugar and singing. there was just enough daylight remaining to prepare for the most important portion of the event: roasting marshmallows, and making s’mores. it was my reward to find some green, yet sturdy, willow branches to use for roasting. with my trusty girl scout emblem-embossed jackknife, i expertly carved sharp points on each of five branches, then handed four of them to my beloved counselors. with the last branch, i pierced a marshmallow, and held it over the coals of my fire, until the ooey-gooey substance became golden brown. then i popped it in my mouth. heaven. i passed on the graham crackers and Hershey bars, content to revel in soft and puffy confection.
thanks to Ashley Rodriguez, whose not without salt blog inspires and illuminates. and from whom i borrowed this wonderful marshmallow recipe. it’s really fun to make and took me back to a very sweet time in my life.
homemade marshmallows
a recipe from Alton Brown, adapted by Ashley Rodriguez
INGREDIENTS
3 packages unflavored gelatin
1 cup cold water, divided
12 ounces granulated sugar, approximately 1 1/2 cups
1 cup light corn syrup (or glucose)
1 teaspoon kosher salt
1 vanilla bean, seeds removed
1/4 cup confectioners’ sugar
1/4 cup corn starch
nonstick spray
DIRECTIONS
- place the gelatin into the bowl of a stand mixer, along with 1/2 cup water.
- in a small saucepan, combine the remaining 1/2 cup water, granulated sugar, corn syrup and salt.
- cover the pan, and cook over medium-high heat for 3 to 4 minutes.
- uncover the pan, clip a candy thermometer on the side of the pan and continue to cook until the mixture reaches 240F (approximately 7 to 8 minutes). immediately remove from heat.
- with the whisk attached, turn your stand mixer on low speed and slowly pour the syrup mixture from the pan down the side of the bowl and into the gelatin mixture.
- when all the syrup has been added, increase the mixer speed to high (be careful that the hot mixture doesn’t splat on you).
- add the vanilla seeds, and continue to whisk until the mixture becomes very thick and lukewarm, approximately 12 to 15 minutes.

- while the mixture is whipping, combine the confectioners’ sugar and cornstarch in a small bowl; set aside.
- line a 13 x 9-inch metal baking pan with aluminum foil (i used nonstick foil), then coat with nonstick cooking spray.
- completely cover the sides and bottom of the pan with the sugar and cornstarch mixture, and return the remaining quantity to the bowl to use later in the process.
- pour the whipped mixture into the prepared pan, using a spatula sprayed with the cooking oil to spread the mixture evenly in the pan.
- dust the top with enough of the remaining sugar/cornstarch mixture to lightly cover, and reserve the rest for later.
- let the marshmallows sit uncovered for at least 4 hours and up to overnight.
- turn the marshmallows out onto a cutting board, and cut into 1-inch squares using a pizza wheel or sharp knife dusted with the sugar/cornstarch mixture.
- once the marshmallows have been cut, lightly dust all sides of each marshmallow with the remaining mixture.
- store in an airtight container for up to 3 weeks (really? i can’t imagine these marshmallows being around that long).

try the marshmallows in a mug of rich hot chocolate or as part of a decadent s’more.

a few days ago, NPR broadcasted an interview with The Atlantic National Correspondent Jeffrey Goldberg, who commented on the genesis of Utah (R) Senior Senator Orrin Hatch’s new Chanukah composition (watch the studio music video). whatever your religious or political beliefs, i’m taking the high road to say the senator’s effort was a thoughtful gesture, however musically underwhelming.
while my mom and i are more aligned in our political philosophies than in our faiths, i wanted to extend my own heartfelt Chanukah gesture by creating a little dinner (we’d had a rather hefty lunch) reminiscent of her childhood. over the years, she’s shared stories about her father, Julius, who regularly made the family latkes (in fact, i’ve been using his recipe for decades); i knew some kind of potato pancake needed to be part of the plan. her dad served them with applesauce, another natural addition to the menu. finally, to address my mom’s love of yeast-based breads, challah would serve as the complement to our light meal.
the first step: find the right challah recipe. sweet, but not as in a dessert. tender, based on the appropriate amount of eggs and fat content. after culling through my cookbooks, i decided to put my trust in the anal editors of Cook’s Illustrated. after our taste-tasting, i have to report that, while verbose (takes one to know one), the editorial team didn’t lead me astray. for the applesauce, i found a phenomenal oven-roasted recipe on Martha Stewart’s site: it’s simple, with a nice layering of flavors from the combination of spices and the varieties of heirloom apples i used, skins on. i gave the latke recipe a little twist by choosing garnet yams, instead of Yukon golds.  of course, my mother thought i was serving her carrots. but i imagine there are few 87-year-olds with 20-20 vision. i’ll be hearing from some opthomologists on that topic.
dinner was a smashing success—once we got past the carrot discussion. i trotted out a few little gifts to combat the frigid Northwest temps, like some toasty, sherpa-lined shoes she can kick around in. and a magenta hat trimmed with black buttons to go with her new black pea coat. who says there’s an age cap on the role of fashionista? certainly not my mother.
Challah
a recipe from The New Best Recipe, All-New Edition
makes one large loaf
INGREDIENTS
3 – 3 1/4 cups unbleached organic flour, plus more for dusting the work surface
1 envelope (1/4 ounce) active dry yeast
1/4 cup granulated sugar
1 1/4 teaspoons salt
2 large eggs, plus 1 egg separated (reserve the white for the egg wash)
4 tablespoons (1/2 stick) butter, melted
1/2 cup water, plus 1 tablespoon, at room temperature
1 teaspoon poppy or sesame seeds (optional)
DIRECTIONS
- in a medium bowl, whisk together 3 cups of flour, the yeast, sugar and salt; set aside.
- in the bowl of a stand mixer, combine the 2 eggs, egg yolk, melted butter and 1/2 cup water.
- using the dough hook, add the flour mixture to the wet ingredients.
- knead at low speed until a ball forms, about 5 minutes. add the extra flour 1 tablespoon at a time, only if needed.
- place the dough in a very lightly oiled bowl, turning the dough over to coat.
- cover with plastic wrap, and let rise in a warm place until doubled in size, 1 1/2 to 2 hours.
- in a small bowl whisk the egg white with the remaining tablespoon of water; cover and refrigerate, until you’re ready to use.
- when the dough has doubled, gently press down to deflate.
- cover again with plastic wrap and let rise again until double, 40 to 60 minutes.
- transfer the dough to a lightly floured surface, and divide dough into 3 equal pieces (the actual recipe has more intricate instruction for braiding, but i kept it simple).
- roll each piece of dough into a 16-inch-long rope, about 1 inch in diameter.
- line up the ropes side by side, and braid them together, pinching the ends of the braid to seal them.
- place the braid on a lightly greased baking sheet, loosely drape the loaf with plastic wrap, and let rise in a warm place until the loaf becomes puffy and increases in size by a third, 30 to 40 minutes.
- adjust oven rack to the lower-middle position, and preheat oven to 375F (my oven tends to run hot, so i chose 350F).
- brush the loaf with the egg wash and sprinkle with seeds, if you’ve chosen to use them.
- bake until golden brown, about 30 to 40 minutes (i cooked for about 20 minutes, and the loaf was done).
- place the baking sheet on a wire rack, and let the challah cool completely before slicing.
- adjust oven rack to the lower-middle position
Roasted Applesauce
a recipe from Martha Stewart Living
makes eight 1/2-cup servings
INGREDIENTS
1/4 cup water
6 tablespoons packed light-brown sugar
1 teaspoon fresh lemon juice
a pinch of coarse salt
2 tablespoons butter, cut into small pieces
3 pounds small assorted apples, about 10, cored (i used a mix of King David, Waltana, Gravenstein and Golden Russet, which created a more tart applesauce…yum!)
1/2 teaspoon ground cinnamon
a pinch of freshly grated nutmeg
a hefty pinch of ground cloves
DIRECTIONS
- preheat oven to 425F.
- combine water, sugar, lemon juice and salt in a 9 x 13-inch baking dish.
- core apples (the heirloom apples didn’t need to be peeled).
- scatter butter pieces over mixture; top with apples.
- roast until apples are very soft, 30 to 40 minutes.
- working in batches, pass the apple mixture through the medium disk of a food mill and into a bowl. (um, i don’t have a food mill, so i pureed the batches in my KitchenAid blender. alternatively, try a food processor.)
- serve warm, at room temperature or chilled.
the applesauce can be refrigerated in an airtight container for up to 5 days.
Juli’s Sweet Potato Latkes
makes 8 latkes
INGREDIENTS
one large sweet potato, grated (ok, not technically; i used a garnet yam)
1/2 small yellow onion, chopped
2 large eggs
3 heaping tablespoons flour
salt and pepper
3 tablespoons grapeseed oil
DIRECTIONS
- in a medium bowl, combine grated sweet potatoes and chopped onions.
- add eggs and stir until well integrated.
- add flour and mix until well combined.
- add salt and pepper.
- let the mixture rest for about 10 minutes.
- heat the oil in a large skillet over medium-high heat.
- cook the latkes on each side until golden brown.
- serve warm, with roasted apple sauce and/or sour cream.
 i’ve clearly spent too much time away from the kitchen (and this blog) since the Thanksgiving holiday. while leftovers can be divine, i need to get off the sofa and back to cooking. but before i move forward (or upward), i want to share one more holiday tradition that’s cherished above all others: the pecan roll.
when i recall childhood Thanksgivings at my uncle’s home (the family gathering place), two food-related items come immediately to mind: drumsticks, one of which my uncle embossed with my name each year (i kind of think the other leg was allocated to my cousin Pete), and pecan rolls, which arrived in delightful boxes, fresh from a local bakery. fixated on this delicious duo, i remained unconcerned about anything else my aunt worked lovingly and laboriously to serve.
i’d generously slather the sticky, sweet pecan rolls with butter—taking a gooey little bite with my left hand, then i’d turn my attention to wrestling the too-big turkey leg with my right hand. ever tidy, in a lovely (and prissy) velvet dress (my mom and sister had dresses of matching fabric), i’d genteelly dab the corners of my mouth with my napkin. (the entire experience an apparent catalyst for spending most of my undergraduate years and beyond in flannel, jeans and hiking boots; i did keep a bandana in my back pocket to maintain my fastidious demeanor.)
whatever the genesis for your family holiday traditions, Thanksgivings with my uncle (an incredible jazz musician, sculptor, radio and television pioneer, Corvette-empassioned bohemian) set the annual baking of pecan rolls at my house into motion. these sticky, rich, easy-to-make rolls disappear fast, so grab one for yourself before it’s too late. not even Nancy, George and Bess will be able to unearth a single one.
Pecan Rolls
a variation based on combined recipes from Country Inn and Bed & Breakfast Cookbook and Better Homes and Gardens Old-Fashioned Baking
INGREDIENTS
for the dough
2 cups scalded milk
2 tablespoons sugar
1/4 cup butter (1/2 stick), plus some to butter bowl, pans
1 teaspoon salt
1 envelope (1/4 ounce) active dry yeast
2 eggs, beaten
5 to 5 1/2 cups unbleached organic flour
for the topping
2/3 cup butter
1 1/3 cups packed light brown sugar
4 tablespoons light corn syrup
48 pecan halves or 1 1/3 cups chopped pecans
for the filling
3 tablespoons butter, melted
1/2 cup sugar
1 heaping teaspoon cinnamon
DIRECTIONS
- combine the scalded milk, sugar, butter and salt (i just throw all these together, then microwave); pour into bowl of stand mixer, and cool until lukewarm.
- add the yeast and beaten eggs; beat well.
- with the dough-hook attachment, gradually add the flour until a smooth dough forms.
- place the dough in a buttered bowl, cover and let rise in a warm place until double.
- butter two 9 x 1 1/2-inch round baking pans.
- while the dough is rising, prepare the topping by first melting the butter in a medium-size saucepan.
- stir in the brown sugar and corn syrup, and cook until just blended.
- divide the mixture evenly between the two baking pans.
- place the pecan halves or chopped pecans on top of the mixture; set pans aside.
- punch dough down, then turn out onto a floured surface.
- divide dough in half.
- roll out the first half of the dough into a 12 x 8-inch rectangle.
- brush the rectangle with 1 1/2 tablespoons melted butter.
- combine sugar and cinnamon in a small bowl.
- sprinkle one half of the mixture evenly over the dough.
- tightly roll up the rectangle, jelly-roll style, beginning with one of the 12-inch sides.
- pinch the seams to seal.
- cut into 10 to 12 pieces, and place into one of the baking pans.
- repeat the process for the second half of the dough.
- cover both pans and place in a warm place to rise until nearly double.
- preheat oven to 350F.
- bake for about 20 minutes or until done.
- let the rolls cool slightly, then invert pans onto serving plates (if the rolls are too hot, the gooey topping will slide off when you flip the pan onto the plate; the voice of experience).
serve warm, any time.

